Sunday, April 12, 2020

Venison Schnitzel

Venison Schnitzel

Dust venison steaks in Original Camp Mix. Pound steaks with meat tenderizer until approximately 1/4 inch thick. Dredge in Kentucky Kernel Seasoned Flour. Dip steaks in egg wash and re-dredge in flour. Melt butter in a cast iron skillet over medium high heat. Fry steaks in butter until golden brown, approximately 5-6 minutes per side.


Monday, November 13, 2017

Tony's Venison Shepherd's Pie

With Deer season opening in a few days, I was trying to figure out what to take for quick easy meals for when we come in from the evening hunt. Something very hardy but quick to heat up for dinner. With chili and pasties already on the menu, what should I take? Ah yes, Shepherd's Pie would be perfect. With all the recipes on the internet, which one would be a good one? None of the recipes I found sounded like what I was looking for. Most used too much tomato, or used several ingredients that I didn't have on hand. Since I didn't find what I was looking for, I guess I should come up with my own. This turned out absolutely fantastic, if I don't say so myself. Give it a try and tell me what you think.

Tony's Venison Shepherd's Pie


  • Mashed Potatoes (Do you really need a recipe for mashed potatoes?) A couple cups worth. Enough to generously cover the filling.
  • Cheddar Cheese
  • 1 Pound Ground Venison
  • 1 Can Beef Broth 
  • One Small Onion Chopped
  • Two Cups Frozen Mixed Vegetables (Carrots, Peas and Green Beans)
  • 1/4 tsp Greek or Italian Seasoning
  • 1/4 tsp Garlic Powder
  • 1/2 tsp Black Pepper
  • 1/4 tsp Salt
  • 1 Can Rotel Drained
Directions
  1. Prepare your mashed potatoes.
  2. Preheat oven to 400 Degrees F
  3. In a skillet, brown your venison.
  4. Once the venison is browned, add the can of beef broth and simmer until about half of the broth is cooked off. (Since Venison is naturally lean, this adds a little fat and lots of flavor.)
  5. Add the onions and continue simmering until all the liquid is cooked off.
  6. Add the pepper, salt, garlic powder, Greek seasoning, vegetables and the Rotel.
  7. Continue cooking for about five minutes to heat everything through. 
  8. Transfer the meat mixture to a baking dish.
  9. Cover the filling with the mashed potatoes and sprinkle the top of the potatoes with the cheddar cheese. 
  10. Bake in the preheated oven for approximately 30 minutes.
  11. Serve Hot

Sunday, October 2, 2016

Venison Vegetable Barley Soup

With fall's arrival, I have been craving Venison Stew. For some reason though while picking up the ingredients I decided to pick up some barley and make some Venison Vegetable Barley Soup instead. This soup was fantastic. Glad I have lots of leftovers for lunches.

Venison Vegetable Barley Soup
  • 1 tsp Seasoned Salt
  • 1 tsp Onion Powder
  • 1 tsp Garlic Powder
  • 1lb Venison Stew Meat, cut into 1" cubes
  • 2 Tbs Canola Oil
  • 4 Cups Beef Broth
  • 3 Medium Potatoes, Peeled and Diced
  • 1 Cup Sliced Fresh Carrots
  • 1 Cup Chopped Celery
  • 1/2 Cup Chopped Onion
  • 2 Cups Frozen Mixed Vegetables 
  • 1 Can Diced Tomatoes Undrained
  • 1/2 Cup Medium Pearl Barley
  • 1/2 tsp Salt
  • 1 tsp Pepper
Directions:

  1. In a one gallon Ziploc bag, combine the seasoned salt, onion powder and garlic powder. Add the venison and shake well to coat.
  2. Brown the venison in oil until the meat is no longer pink. Drain
  3. Add browned venison to the slow cooker. Add the beef broth, potatoes, carrots, celery and onion. Cover and cook on high for 4 hours.
  4. Add corn, tomatoes, peas, green beans, barley, salt and pepper. Cover and cook for 2 more hours. 
If you wanted a little more tomato flavor, you can substitute 1 cup of beef broth with 1 cup of tomato juice.

Saturday, June 4, 2016

Venison Cudighi

Let me guess, you have never heard of Cudighi. That's not surprising at all. Cudighi is a very regional sausage found in a few towns in Michigan's Upper Peninsula. So what is Cudighi? Cudighi is a spicy Italian sausage that is typically used for sandwiches or as a pizza topping. Many restaurants in the UP serve Cudighi sandwiches that are grilled and topped with pizza sauce, onions and mozzarella cheese. I absolutely love these things!

Before we can enjoy one of these delicious sandwiches we first need to make some sausage.

Venison Cudighi
  • 3lbs Ground Venison
  • 3lbs Ground Pork
  • 2Tbs Salt
  • 1tsp Pepper
  • 1/2 tsp Cinnamon
  • 1/2tsp Nutmeg
  • 1/2tsp Allspice
  • 1tsp Red Pepper Flakes (Optional)
  • 1 Cup Dry Red Wine (I prefer Chianti)
  • 6 Cloves of Garlic
  • 1 Cinnamon Stick
  • 2 or 3 Whole Cloves
First combine the wine, cinnamon stick, garlic and cloves in a sauce pan and bring to a boil, Then simmer for five minutes. Strain and set aside for cool completely.

Now take the salt, pepper, cinnamon, nutmeg and allspice and mix together. Add the spice mixture to the ground venison and pork and mix thoroughly. Next add the cooled wine and mix thoroughly. Now let the sausage season in the refrigerator for a couple days.

At this point I like to form into quarter pound patties and freeze them until ready to use. Another option is to leave them in bulk packages to use as a great substitute for Italian sausage.

Monday, April 18, 2016

My Most Memorable Day in the Woods and My First Long Beard

Well back to the on again/off again blog. I really need to keep up with this thing. Hopefully this will be the start of great things to come.

Let's start this off with me telling you about what has to be one of my most memorable days hunting or fishing. Where to start? Let's go back a couple years when I heard there were some left over turkey licenses for my area. While I have been hunting and fishing my entire life I had, for some unknown reason, never hunted turkeys. I thought to myself, "What better time to give it a try?" So I purchased my permit, a hen decoy, and a H.S. Strut Raspy Old Hen Call Combo Kit I found in the bargain cave at Cablea's. Now I was ready to do some turkey hunting. The first time out I was able to call a Tom within 50 yards but couldn't get him to close the distance for me to get a shot. I knew it wasn't going to be easy, but by being able to call that gobbler in that close I was hooked.

Then came last season and I was able to call in a bunch of Jakes. While not ideal I was determined to get a turkey and took one of the Jakes. Even though it was a bunch of Jakes that I called it, I still felt a level of accomplishment. With my turkey virginity popped and meat in the freezer I was already looking forward to next spring.

You can say that I am not completely hooked on turkey hunting and opening day couldn't come soon enough. I was lucky enough to draw the week of April 18th, the first week of Spring Turkey Season here in Michigan. I couldn't do enough scouting due to my daughters wedding the prior week, but Saturday and Sunday I put in several hours scouting and trying out the new crow call I purchased. To my amazement the crow call worked like a charm. I was able to locate several different Toms and have four prime locations ready for opening day. But which one to hunt? I figured one would be better in the evening and another I wanted for the early afternoon to try so that left option A or B. While not the optimal area, but the same spot I shot the Jake last year, I chose option A. Something just told me that was the spot to hunt in the morning. Five AM couldn't get hear fast enough.


The alarm goes off at five AM and I start questioning myself, "Do I really need to get up at 5AM? Should I really have had that last beer?" OH well I need to get to my spot and boy am I glad I did. I had no idea what lay in store for me. I arrived at my chosen spot just before sunrise and the darkness started to fade. Not long after I got settled in the woods came alive with Toms gobbling from their roosts. I was almost surrounded by Toms in their roosts. I could make out at least six different birds all within earshot. I waited a little while before I started calling, but as soon as I did they were all answering back. I answered back a few times then gave them a rest to not scare them off. As I am waiting them out, I caught a glimpse of an owl as he turned and landed above my decoys. I sat and watched him for a few minutes as he let out a beautiful owl call. He then turned and flew off towards the north and called again. I couldn't believe my luck. That was a great sight to see. But things only got better. At about 7:00 I had a couple crows show up and started calling like crazy. While it started to get a little annoying I didn't mind one bit since I have always loved the sound of crows while hunting. This lasted for about 10 minutes then they flew off to the east. Now mind you all this time I am still hearing Toms everywhere around me. I am calling here and there and they are answering. At around 7:30 I had a beautiful doe step out right behind my decoys. She picked my up quickly and kept a sharp eye on my while one of her offspring slid off about 50 yards away. She finally spun and went to the north then followed the other deer. I am now thinking to myself, how can things get any better today? I grab my box call and let out another yelp which is immediately answered by two Toms about 75 yards away.  As soon as they answered another deer appears and heads right to where I think the Toms just called from. I hit the box call again and they answered immediately and the game is on. I grab my smaller call and give a few purrs and here they come over the ridge 60 yards away. I purred a little more and they turned and come towards the decoys. I noticed they were going to be coming directly towards me and remembering that they doe had picked me out so quickly I figured I should take the shot rather quickly. I got ready and as soon as they were within comfortable range I took a shot at the lead Tom. I guess my aim was true and he dropped on the spot. My first long beard was on the ground. While not the biggest Tom in the world, I will always cherish this hunt. Everything was perfect from the time I woke up until the time I harvested my trophy.


9" Beard and 3/4" Spurs
4/18/16
Livingston County, MI


Monday, August 24, 2015

Grilled Wild Turkey Breast

Fall turkey season is fast approaching here in Michigan and I was lucky enough to draw a state land permit for the county I live in. I just started turkey hunting last year and had no idea what I was missing all these years. I fell in love with it instantly. This last spring I was lucky enough to bag my first turkey and had no idea how I should cook it. My first attempt was to cook the tenderloins over an open fire with some Cajun seasonings and it turned out OK but a little dry. Not to be deterred I continued searching for a grilled turkey recipe. Finally I ran across a recipe for the Best Grilled Wild Turkey Breasts on Field and Streams website. I saved the link and waited for my chance to cook up one of the breasts. I just so happened to be heading up to the Thumb for a camping trip with my wife's family so I decided to take one of the breasts and cook it up for everybody. One night for dinner I decided that I could cook it up and cut it into little cubes and server it as an appetizer. While I was slicing it up i helped myself to a little piece to make sure it turned out OK. I could not believe how incredible it tasted. It was so juicy and tender and OH so flavorful. I think the rest of the family agreed with my assessment. That breast disappeared in less than five minutes. I cannot wait to make this again.

Grilled Wild Turkey Breasts

10-12 3-ounce turkey breast steaks (I used one breast and cut mine in portions about the size of a deck of playing cards)
1 Tbsp. kosher salt
½ tsp. pepper
3 cloves of garlic, crushed and peeled
¼ cup extra virgin olive oil

Toss the turkey steaks with salt, pepper, garlic, and olive oil. Cover and chill for one to two hours.
Preheat grill to medium high. Remove turkey from fridge and let marinate at room temperature for 20 minutes. Remove turkey steaks from marinade. Grill for 3 to 4 minutes on each side or until cooked through.

Thursday, January 8, 2015

Venison Summer Sausage

Well this years deer season was my best year to say the least. I was able to take three deer on opening day (two does and a six point) and a week later another doe. With all the venison in the freezer I figured I should make up a batch of summer sausage. While searching for a good recipe, I stumbled upon this recipe that sounded like a great starting point. I made a test batch and it turned out fantastic. It was actually better than summer sausage I have purchased from commercial smoke shops in the area. I plan on making a larger batch this weekend. As I said this is a great base recipe. I plan on adding jalapenos and cheese to a couple pounds this time.

Venison Summer Sausage

5 pounds ground venison 
2 tablespoons sugar-based curing mixture (such as Morton® Tender Quick®) 
2 teaspoons mustard seed 
2 1/2 teaspoons garlic salt 
2 1/2 teaspoons ground black pepper 
1 teaspoon liquid smoke flavoring 

  1. Place the venison in a large mixing bowl. Sprinkle with the curing mixture, mustard seed, garlic salt, pepper, and liquid smoke. Mix well with your hands until the mixture is evenly blended and begins to stick together, about 2 minutes.
  2. Cover the bowl with plastic wrap and refrigerate overnight
  3. Preheat an oven to 170 degrees.
  4. Divide the mixture into 5 one-pound logs
  5. Roll logs in aluminum foil and poke holes in the bottom of the foil to drain any fat.
  6. Place onto a broiler pan with a wire rack.
  7. Bake in the preheated oven until the logs are no longer pink in the center, and an instant-read thermometer inserted into the center reads 170 degrees F, 6 to 8 hours. Turn the meat once or twice during cooking. Allow to cool before slicing thinly and serving.


Wednesday, January 7, 2015

Tony's Venison Swiss Steak

Here is another great recipe I had to share. It looks like this blog is becoming a recipe blog. I think I need to get back to the bench and start tying again.

Tony's Venison Swiss Steak

1lb Venison Steaks (Beef Round Steak will work also)
2 Cans Rotel
1 8oz Can of Tomato Sauce
1 Cup Beef Broth
1 Large Onion Cut into thin Rings
2 Carrots Chopped
2 Stalks Celery Chopped
1 tsp Garlic Powder
1/2 tsp Black Pepper
1/2 tsp Salt

Place steaks in crockpot and add the rest of the ingredients on top of the steaks. Cook on low for 6 hours or until tender.

Next time I will thicken remaining broth to make a gravy to serve over mashed potatoes.

Monday, September 1, 2014

Cabbage Roll Soup

I know I have started posting a few recipes but I figured I would share a few new recipes that I enjoy and would make a great addition any hunting or fishing camp menus.

I love cabbage rolls however my wife does not care for them. Needless to say I never get homemade cabbage rolls. Well I decided to make a batch for myself and freeze the leftovers for the future. After making a trip to the farmers market to pick up some fresh cabbage and the rest items needed I was ready to make up a big batch. That was until a friend of mine posted a recipe for Cabbage Roll Soup on his Face Book feed. The recipe sounded fantastic and much easier to freeze than the normal rolls so I decided to make soup instead. Boy am I glad I did. The soup was fantastic and would be real easy to make ahead and take to camp.
Cabbage Roll Soup

 4 cups cabbage, roughly chopped
1 lb. ground beef
1 tsp Worcestershire sauce
1 tsp salt
1 tsp paprika
1 onion, chopped
3 cloves garlic, minced
½ cup water
1 tsp oregano
½ tsp basil
680 mL can tomato sauce (or about 3 cups)
796 mL can diced tomatoes (or about 4 cups)
1 cup rice, uncooked

Instructions
1. Add onion, garlic, Worcestershire sauce, paprika, ground beef and salt to a skillet on medium heat. Cook until the ground beef is browned (about 7 to 10 minutes).

2. In a slow cooker, add cabbage, oregano, basil, tomato sauce, diced tomatoes, water and ground beef mixture and stir to combine.

3. Cover and cook on low heat for 8 to 10 hours.
In last half hour of cooking, cook the rice according to package directions. Add the cooked rice to the slow cooker and stir to combine.


While I did follow the recipe for the most part I did make a couple changes. First I added a teaspoon of pepper. Second I cooked the soup on the stove for an  hour instead of a crock pot so I added the rice with the tomatoes. The biggest change I made was instead of the tomato sauce I substituted Bloody Mary mix. I figured it would add a little more flavor.

This made close to eight pints of soup for the freezer. Well only seven made it to the freezer. I had one of the pints for dinner.

Enjoy!!

Monday, August 4, 2014

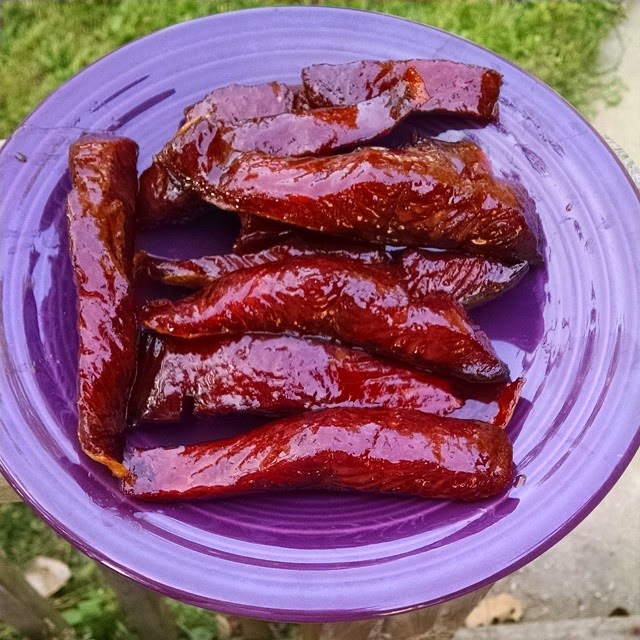
Salmon Candy

Well it has been a long while again. I really need to keep up with this blog. Well I have been looking for a good salmon jerky recipe to make in the Little Chief smoker my lovely wife bought me for my birthday. I kept coming back to this recipe I found for Salmon Candy. There was something about the simplicity of the recipe that kept telling me to make this recipe. Holy crap am I glad I did. This stuff is absolutely fantastic. I cannot stop eating this stuff. Do yourself a favor and try making this.


Salmon Candy

Prep Time: 12 hours curing time
Cook Time: 6 hours smoking time
  • 5 pounds skin-on salmon collars, bellies or fillets cut into strips
  • 10 ounces of kosher salt
  • 1 pound brown sugar
  • 1 cup maple syrup or birch syrup
__________

  1. Mix the salt and brown sugar together. Find a lidded container large enough to hold the salmon; a big tupperware works well. Lay down a layer of the salt/sugar mixture about 1/4 inch deep. Put a layer of salmon down on this, skin side up. Cover the salmon with more salt/sugar mixture. If you need a second layer of salmon, make sure the layer of salt and sugar between them is thick enough so that the pieces of salmon are not touching. Basically you are burying the salmon in salt and sugar. Cover and let cure in the fridge at least 8 hours, and overnight is better. 
  2. Remove the salmon from the cure, which will have become a slurry, and briefly rinse the fish under cold water. Pat dry with a paper towel and set the salmon on a drying rack skin side down. Let this dry in a breezy place for 2 hours. I put the racks under a ceiling fan near an open window with another fan blowing at the fish from the side. You are doing this to form a pellicle on the salmon, which helps it smoke properly. Don’t skip this step!
  3. Traditionally salmon candy is cold smoked for several days. If you can do this, go for it. You want to bring the temperature up gradually over the course of an hour or so and let it sit at around 180°F to 225°F for at least 4 hours, and up to 8 hours if you like your salmon candy harder and smokier.
  4. Every 90 minutes to 2 hours, paint the salmon with the maple syrup. This also helps to remove any albumen — the icky white stuff — that can form between the fish flakes if your smoker gets a little too hot too fast.
  5. When the salmon looks good and lacquered, typically about 6 hours, remove it to the drying racks again and paint it one last time with the maple syrup. Allow to cool to room temperature before storing. Salmon candy will last a week in the fridge, longer if vacuum sealed. It freezes well, too.

Saturday, February 1, 2014

Queso Blanco Dip

With tomorrows Super Bowl I thought I would share what is in my opinion the greatest cheese dip ever created. If you are attending or hosting a Super Bowl party this Queso Blanco Dip will be the hit of the party. Every time I make this dip, I cannot stop eating it and I have received so many compliments at every party or pot luck I have made this for. Make some up and just watch it disappear.

Queso Blanco Dip

2lb Block Velveeta Queso Blanco Cheese cut into 1" blocks
2 Cans Rotel Original (Undrained)
1 Link (6oz) El Popular Chorizo Sausage

"Brown" Chorizo sausage and drain all fat. In Fondue pot add Rotel and Velveeta and melt cheese over medium heat. Once melted add Chorizo and stir everything together.


Sunday, January 26, 2014

Back with an Orange Asher

I have obviously been neglecting this blog for a little too long. This past year kept me busy with way too many personal matters that are hopefully over for now. I promise I will be better with posting from now on. With that said it's time to get back to tying. 

Let's get back at things with a very simple fly that everybody should have in the fly box. The Orange Asher is a very simple fly that uses only three materials and produces fish when a midge hatch is on. You can fish it high in water to imitate adult midges or you can fish it low in the water to imitate an emerging midge. Not too shabby for a fly that takes about a minute to tie. Tie some up you won't be disappointed.


Orange Asher

Orange Asher
Thread - Uni 8/0 Orange
Body - Tying Thread
Hackle - Whiting Grizzly

Step One

Start Thread and Cover Hook Shank

Step Two

Tie in Hackle Feather at Hook Bend. Wind Thread Forward

Step Three

Palmer Hackle Forward with Even Turns

Step Four

Create Head and Whip Finish


Sunday, July 28, 2013

The Simplicity of Tenkara

Recently I  plunged into the world of Pinterest. What a mistake! Talk about a time waster. With that said what a valuable site with a wealth of information. I had no clue and feel a little foolish for waiting so long. After looking around Pinterest I started a bunch of boards dedicated to collecting different fly patterns for me to go back to and tie or just store the flies patterns. While looking at different flies I kept coming across Tenkara patterns. While I knew of Tenkara fishing I had never really looked at the patterns people were using and tying. So I though I would get back to the bench and tie up a few to try on a few small creeks I know of.

Once I started really looking at the Tenkara flies it amazed me how simple they are to tie. Most patterns call for just three materials. Basically all a Tenkara fly is a hook with a thread body and hackle that is swept forward over the hook eye.  Sometimes simpler is better and on small creeks that do not get a lot of fishing pressure I can see these working real well. Here is what I came up with.

Tenkara Olive


Tenkara Olive

Thread - Uni 8/0 Olive
Hackle - Metz Dun

Step One

Start Thread at Hook Eye and Wrap Back Two Eye Lengths

Step Two

Tie In Hackle Feather

Step Three

Make Five Wraps of Hackle

Step Four

Push Hackle Towards Hook Eye and Wrap Thread to Form Cone of Hackle

Step Five

Form a Tapered Body with Thread

Step Six

Whip Finish Behind Hackle

Now take your new Tenkara flies out and catch yourself a nice brookie for breakfast.


Sunday, June 9, 2013

Al's Foam Hopper

Well I guess I have ignored this blog for way too long. Time to get back to tying a few flies.

Well bluegill season is in full swing here in Michigan. I love fishing for these little buggers. They readily take just about anything you put in front of them and boy do they put up a great fight for such a little fish. Besides that they sure do taste great.  For me there is nothing better than pan fried bluegills with home made French fries and a side of cole slaw.  So simple and oh so delicious!  I'm drooling must thinking about it. Think I will have to go out and catch me a bucket load for dinner. Guess I should tie up a few flies to get the job done.

Back in 1999 www.flyanglersonline.com published an article by Al Campbell about foam panfish flies. Both flies in the article have worked well for me when fishing for bluegills. Tonight I figured I would tie up some of his Foam Hoppers. Not only does this pattern work for panfish but it has also worked well for me when fishing for trout during the hot summer months.

 
Al's Foam Hopper


Al's Foam Hopper
 
Hook - Mustad 9671 #4-14
Wing - Elk Hair Tied The Same As Stimulator Wing 
Under Body - Yellow Yarn
 
Step One
 
Start Thread
 
Step Two
 
Tie in a Quarter Inch Wide Strip of Foam Covering 3/4 of the Hook Shank
 
Step Three
 
Tie in Copper Wire
 
Step Four
 
Tie in Yellow Yarn
 
Step Five
 
Wrap Yarn Forward
 
Step Six
 
Pull Foam Forward Over the Hook and Tie Off at Starting Point. Make Sure the Foam Extends Over The Hook Bend
 
Step Seven
 
Wrap Copper Wire Forward in Even Wraps
 
Step Eight
 
Tie in Elk Hair Wing
 
Step Nine
 
Pull Foam Back and Tie Off. Trim Foam to Form a Small Tag
 
Step Ten
 
Tie in Rubber Legs on Both Sides of Hook
 
Step Eleven
 
 
Trim Legs and Whip Finish


Sunday, March 10, 2013

Out of the Closet and a Winged Beetle

Well Laurie has finally relented and has let me out of the closest and let me set up my tying area in section of the family room. I guess I was taking to much valuable storage space being in the closet. No I can spend time with the family while tying. Lets see how long this lasts before she relents and lets me move into one of the spare bed rooms. After moving her old roll top desk to the basement family room and a few trips to Ikea I think my tying "room" is finally finished for now. What do you think of the new digs?  Having everything in the storage boxes is going to take a little getting used to, but I think it will help with keeping things organized. I am going to miss the pegboard though.


Well this weekend was the Midwest Fly Fishing Expo and I was lucky enough to get out of the house on Saturday to spend a few hours checking out all the new products, materials and catch a few seminars. One of the presenters this year was none other than A.K. Best. I have learned a lot from his books and was happy I could see him speak and tie in person. I did notice that A.K. kept mentioning his Winged Beetle pattern and almost every fish he showed were caught on this one pattern. I decided then and there that I would tie up a few and give them a shot. 

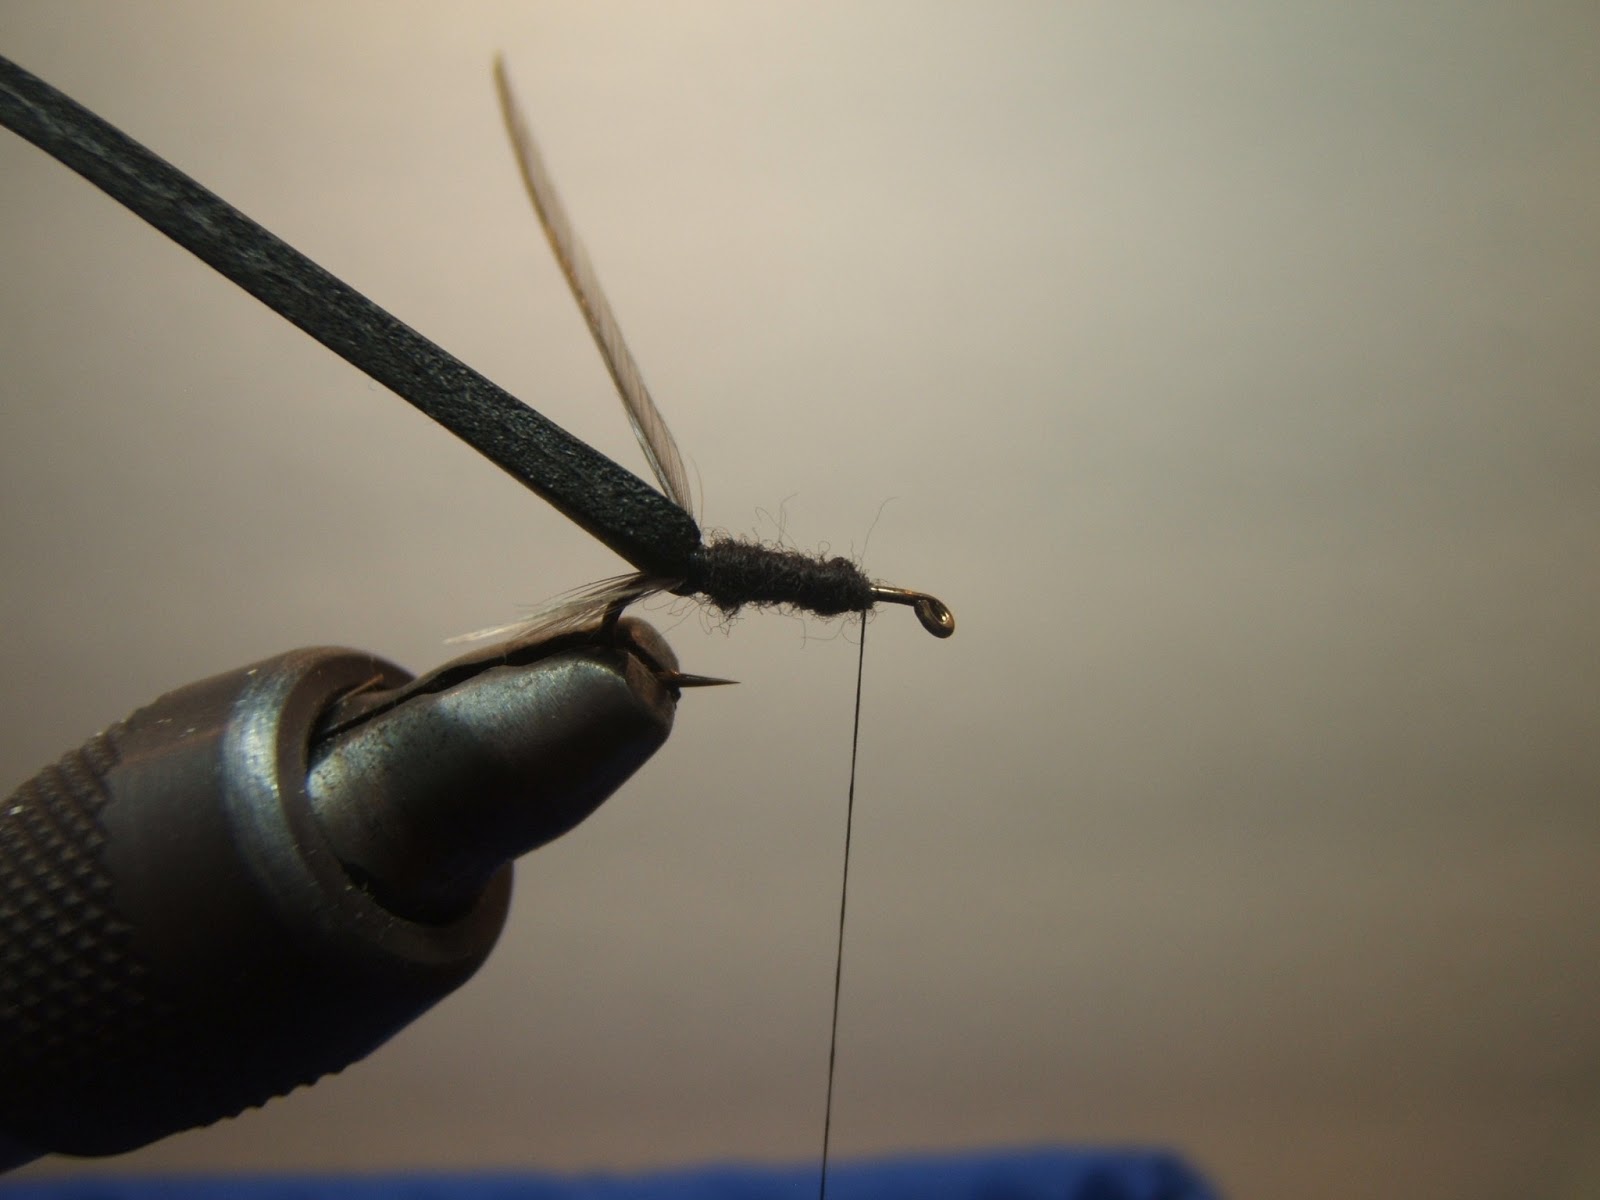
Winged Beetle


Winged Beetle

Thread - Uni 8/0 Black
Tail - Dun Hen Hackle Tips Tied Delta Style
Shell Back - Black Foam
Hackle - Black Saddle Hackle Palmered


Step One

Start Thread

Step Two

Tie in Wings Delta Wing Style. They Should be Flat on the Hook

Step Three

Tie in Foam for Shell Back

Step Four

Tie in Hackle

Step Five

Dub Body

Step Six

Palmer Hackle Forward

Step Seven

Bring Foam Forward and Tie in. Whip Finish.


Saturday, February 2, 2013

Pike Jigs

I know I am not the only person who actually likes fishing for Northern Pike. While they are a slimy ugly looking fish, I have to admit they are very tasty once you get around the Y-Bones. I would have to rank Northern's well within my top five fish to eat, right behind Walleye, Perch and Bluegill. In case you are wondering number five would be catfish.  I'm getting hungry just writing this. I may just have to skip the first six hours of the Super Bowl pre-game tomorrow and hit to the ice to see if I can catch a couple northern's for dinner.

When not fly fishing one of my favorite ways to fish is jigging. I have had great success fishing for bass, bluegill, crappie and perch using jigs. As I was walking around the Ultimate Fishing Show last month I happened upon a vendor selling what they called Pike and Walleye jigs. These thing looked very interesting to me. The only problem I had was they were charging $3.50 each and in my opinion I could tie them for much less and of better quality. So here is my attempt of what they were offering. I cannot wait to give these a try this summer. If they work as well as I think they will, I may have to have a big fish fry at my house.

I tied this one in yellow but you can use any color combination you choose. For Pike red and white should be a winner also.

Pike Jig


Pike Jig

Hook - Lead Jig Head
Thread - Uni 6/0 Yellow
Tail - Black Bear
First Wing - Yellow Saddle Hackle
Rear Body - Spun Deer Hair
Second Wing - Yellow Saddle Hackle
Mid Body - Medium Yellow Chenille
Upper Body - Spun Deer Hair

Step One

Start Thread

Step Two


Tie in Bear Hair Tail

Step Three


Tie In Far Side Hackle Wings

Step Four


Tie In Near Side Hackle Wings

Step Five


Stack Deer Hair with Tips Pointing to Hook Bend on Bottom

Step Six


Stack Deer Hair with Tips Pointing to Hook Bend on Top

Step Seven


Spin Two Clumps of Deer Hair

Step Eight


Trim Hair and add Wings like in Steps Three and Four

Step Nine


 Tie in Chenille and Wrap 2-3 Turns

Step Ten


Stack Deer Hair on Far Side of Hook With Tips Pointing to the Hook Bend To Create Fins

Step Eleven


Stack Deer Hair on Near Side of Hook With Tips Pointing to the Hook Bend To Create Fins

Step Twelve


Spin Two Clumps of Deer Hair and Whip Finish


Trim Deer Hair to Finish

Top Side of Jig