Sunday, April 29, 2012

What a Great Trip For The Most Part


What a great weekend! For some reason, it felt like Grayling was welcoming me home. When I first pulled into Burton's Landing Campground there were three deer standing in the first campsite watching me drive in as if to say "hello and welcome back." I made a loop around the campsite and for some reason pulled into site 10. When I pulled in there was a big Tom turkey right where I eventually set up my tent. Personally I enjoy seeing wildlife, and I thought to myself as I watch the turkey walk away that this is starting out to be a great trip.


Campsite for the Opener

With camp set, I got prepared for the cold night ahead. The last time I looked at the temperature it was 29 degrees and it had dropped from there. Thank God I brought enough warm clothes and had a hot campfire going all night. Even with the fire I had to eventually lower the ear flaps on the Kromer.

Saturday morning it was time to hit the river. I walked down to the landing ready to go. I first looked downstream to see if there were any other fishermen in the area. Then I looked upstream and couldn't believe my eyes when I saw a bald eagle come over the tree tops and fly down the river.

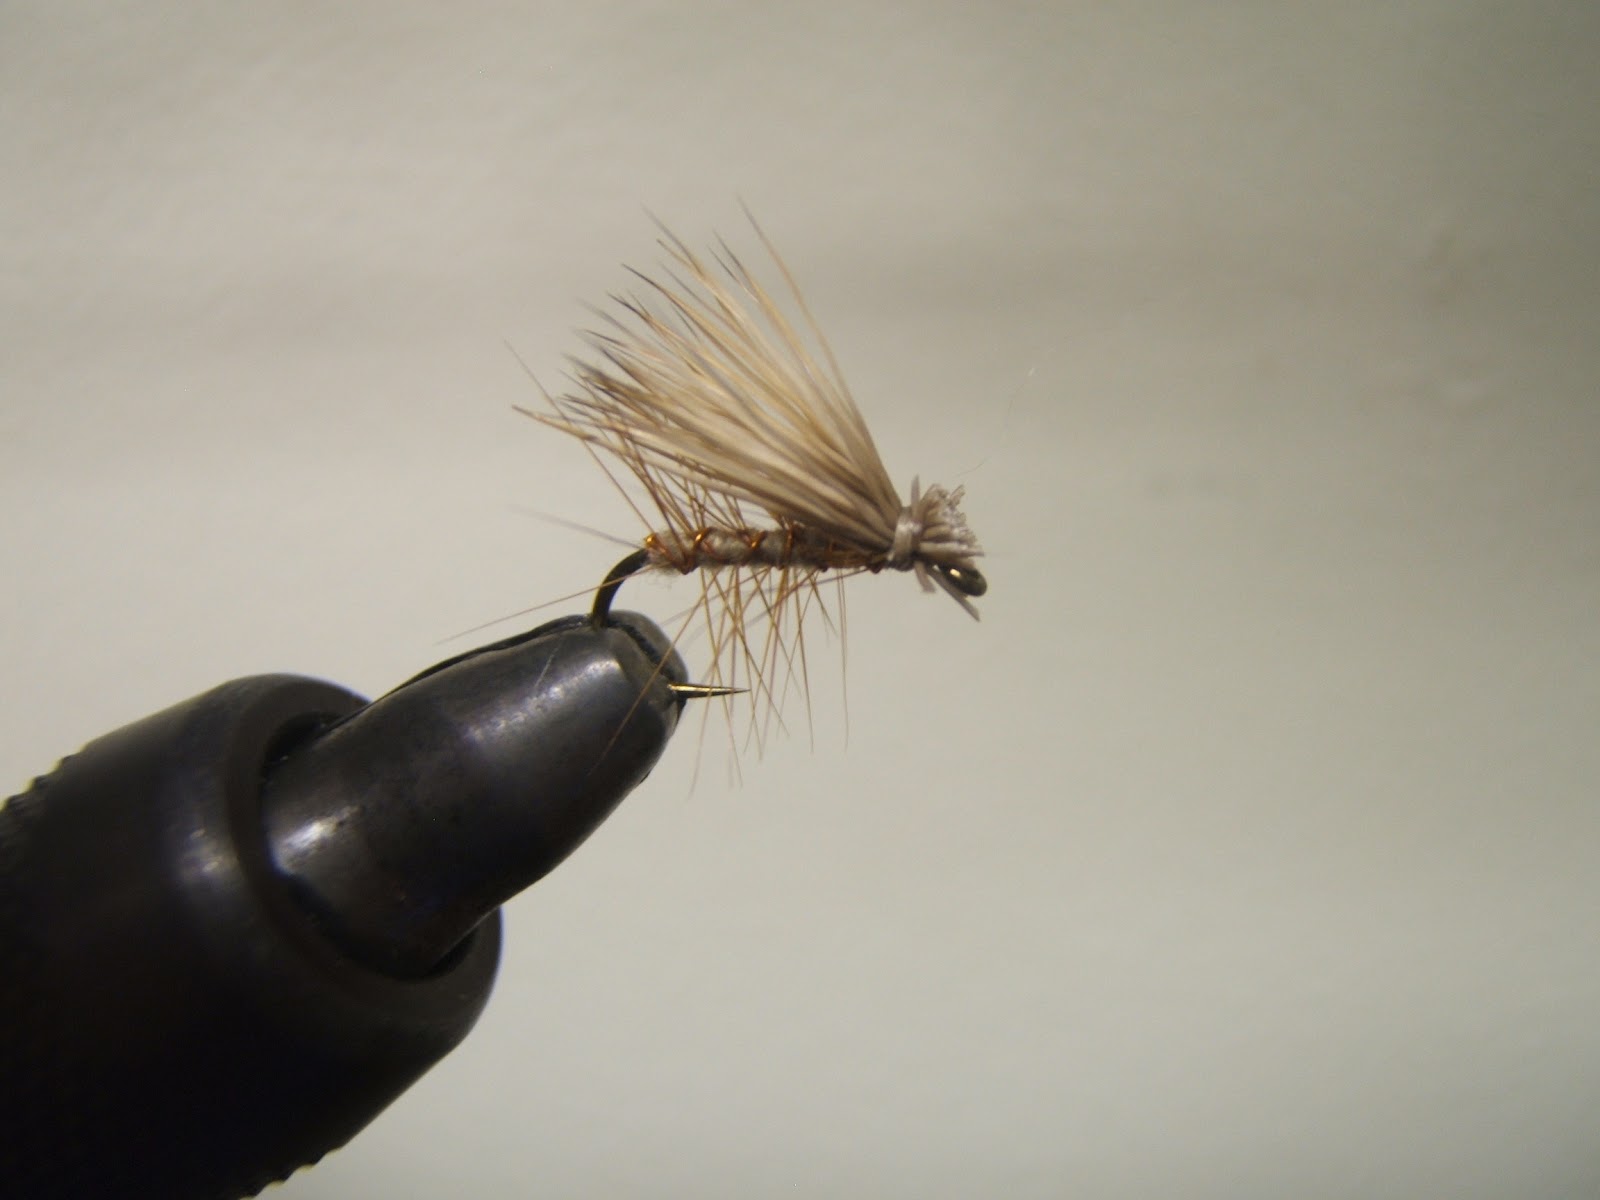
It took me about 5 casts to eventually get back into the rhythm and throw a nice tight loop. Don't get me wrong, I still made lots of bad casts, but for the most part I was back in the rhythm. No bugs were hatching so I started with a bead head Pheasant Tail I had tied. I know that nymph fishing produces the most fish, however I prefer watching the dry flies on the water and seeing the take. I spent the first hour and a half with no takes. Kind of discouraging to say the least. The two Kingfishers looking at me from their branch seemed to be saying, "You're doing it wrong." That's when the black caddis started hatching and the little ones started looking up. I noticed a nice little fish rising not far from me so I tied on a CDC and Elk and sent the fly his way. It took three casts before I put it where I wanted. Fish On!!! As I reached down to land a nice little 12" brown, he shook the hook and swam away. Fish-1, Me-0. That would have been the largest fish landed all day. OH well… I did end up catching a bunch of smaller fish with the largest being around 8". For some reason I have never had success with the Little Black Caddis hatch. Well at least with larger fish - the small ones seem to love them. Long story short, at least I didn't get skunked!

The snacks I took with me just were not doing the trick so I headed back to the campsite for a little lunch. As soon as I took off my vest I hear a bird call I didn't recognize. I looked up in the pine tree about 10 feet from the picnic table to see a pair of Kirtland's Warblers. I couldn't believe my eyes and had to break out the phone to make sure they were actually Kirtland's. OK, I am an idiot. I should have been taking pictures instead of making an ID on Google. 

Spent a few more hours fishing until the caddis hatch finally ended. I guess in all the excitement I didn't notice that my waders were leaking. My socks and pants, up to my knees, were soaked! I ran into the Old AuSable Flyshop to get something to repair the leak. I guess I didn't patch the correct spot and they leaked again. When I went fishing at Keystone Landing the next day the other foot leaked too. At least this time when I repair them, I can do it properly at home. Looks like I get to do a blog on repairing waders. LOL.

Here are a few pictures of the AuSable for your enjoyment:


Burton's Landing Looking Downstream From The Campsite


Burton's Landing Looking Upstream From The Campsite


Keystone Landing Looking Downstream From The Campsite


Keystone Landing Looking Upstream From The Campsite

Thursday, April 26, 2012

I Must Be Crazy!!

I just took a look at the weather report for this weekend's opener!! I must be fricking crazy to be heading north! High of 51 on Saturday with a low of 26. Did I mention that I was camping in a TENT? Good thing I have a great sleeping bag and a heater for my tent. It is going to be a little chilly at night. I felt like I was packing for deer season with all the warm clothes I was packing. I even packed my Stormy Kromer just in case. I love my Kromer. It is by far the best winter hat I have owned and I wear it every day during the winter. If you want more information on the Stormy Kromers check out their website. They are made right here in Michigan and well worth every penny. I plan on picking up a blaze orange one for deer hunting this year.

Had to make sure I had enough streamers. Streamer fishing is not my strong point but if the weather turns out to be like the forecast, I guess I won't have much of a choice. Actually this is the reason I am still going despite the conditions. If the bugs are not hatching, it will force me out of my comfort zone. I am actually looking forward to ripping some streamers this weekend. I will let you know how it goes.

I cannot believe that I just realized while writing this post that I didn't pack my copy of the Jerry Garcia Band Live. That would have been bad JuJu if I didn't take it with me. For some reason, this has always been my fly fishing album. While it is not the only album I will be taking with me to listen to while hovering over the campfire trying to keep warm, I am sure it will be played the most.

Well I am off until Monday. Wish me luck!!

Sunday, April 22, 2012

More Projects and EHC

I've been working on a few projects lately that people may be interested in learning about! You may have noticed that I added a bead head sizing chart. The other projects will have to wait to be released until a later date. I thought I had better put the projects on hold for the night so I can tie up a few more flies for my upcoming fishing trip this weekend. I have started posting step-by-step instructions for the flies I have been tying. Tonight I was working on some additional Elk Hair Caddis and I figured since I didn't post details originally for this fly, I am posting them now in case anybody is interested.

Tonight I felt like listening to some live Grateful Dead. How do you choose -- there are so many great live shows!! When all else fails, picking a home town show always works. The Dead released their June 20, 1991 show at Pine Knob as part of their Download Series. This show was Volume 11 in the collection. Listening…I am thinking what a great show…I wish I would have been there! This show happened before I started really listening to the Dead but I do remember thinking to myself that I should get tickets and go. It wasn't until about a year later that one of my friends in college called me and asked if I wanted to go see the Dead at the Palace. I should have listened to my original instincts and gone to see this show.

Elk Hair Caddis

Elk Hair Caddis

Hook: Mustad 94840 #12-18
Thread: Uni 8/0 Color to Match Natural
Rib: Fine Copper Wire Counter Wrapped over Hackle
Hackle: Brown or Color to Match Natural Palmered Front to Back
Body: Super Fine Dubbing to Match Natural
Wing: Elk Hair

Step One

Start Thread

Step Two

Tie in Copper Wire

Step Three

Dub Body, Wrap Forward and Tie In Hackle

Step Four

Palmer Hackle to Hook Bend. Capture Hackle Tip with Copper Wire and Counter Wrap Rib Forward

Step Five

Tie in Elk Hair Wing

Step Six

Clip Elk Hair to Form Head 

Step Seven

Whip Finish

Now go catch a few fish with this nice fly!!

Thursday, April 19, 2012

Hook Conversion Charts

With all the manufacturers and styles of hooks it gets confusing when you need to substitute one manufacturer's for another. I have spent a few weeks compiling a list of all the different manufacturers of hooks and comparing them to other manufacturers. This has been a very daunting task. Some manufacturers say their hook A compares to X while another says that X compares to Y.  Check out the Tab above to see what I have come up with.

Tuesday, April 17, 2012

Drumming to the Light Spruce

It seems like I have been avoiding the vise lately. I don't think I have tied any flies since the last blog update. I've been working on a big project that I hope everybody will like once I finally have everything finished. I'm not ready to unveil any details at this point…but I think this project will be well accepted in the fly-tying community! -- At least I hope it is! I have spent a lot of time and effort on it up to this point and I know I will be spending a lot more time on it in the future! Tonight I needed a break from this project and I couldn't think of anything better than tying up a few flies.

I was looking through my boxes and to my surprise I haven't tied up any streamers for the opener and it's only two weeks away. I guess I better get working on a few. Tonight my focus is on a Light Spruces fly. A great little streamer that works very well. Besides that, it looks great in the fly box!

Tonight I was in the mood for a little light background music instead of the more traditional music I tend to listen to while tying. Some great percussion music was in order, specifically Mickey Hart's Planet Drum. If you want to hear some really cool drum music check out any of Mickey's albums. What he can do with different percussion instruments is simply amazing.

Here is what I came up with tonight. While the traditional Light Spruce pattern calls for silver badger hackle, I substituted a really nice ginger hackle that I think looks much better.

Light Spruce

Light Spruce

Hook -  Mustad 79580 #4-12
Thread - Uni 8/0 Black
Hackle - Silver Badger

Step One

Start Thread

Step Two

Tie in Five Peacock Sword Fiber (About 1/3 Hook Length)

Step Three

Tie in Floss and Wrap Forward Just Past Mid Shank

Step Four

Tie in 4 or 5 Peacock Herl Strand and Wrap Forward to About 2 Eye Lengths Behind Eye

Step Five

Tie In Hackle and Wrap 4-5 Turns. Make Sure Fibers Sweep Towards Hook Bend

Step Six

Tie in Matching Pairs of Hackle Feathers. Whip Finish.

Wednesday, April 11, 2012

Itsy Bitsy Teenie Weenie Brassies!!

Fishing tiny flies is a given when fly fishing. It never ceases to amaze me how small of a fly some fish are willing to go after. It doesn't seem like it would be worth their effort to eat such miniscule flies, especially when there are larger flies right on the water next to them! If it were me and there is a fun-size Snickers bar sitting right next to a little tiny sliver shaved off the corner of the same bar, I would try for the normal-size bar -- it would be much more satisfying and worth my effort to pick it up. On some rivers, the fish do not seem to think the same way. They prefer that tiny sliver of chocolate while the fun size bar floats right on past them. I don't get it, but it happens all the time. So when this happens we have to go small, and when I say small, I mean Itsy Bitsy Teenie Weenie. When you can fit a dozen flies on top of a dime, you know you are looking at some small flies. For some reason I got the itch to tie a few tiny Brassies. A simple, easy, but very effective midge pattern.

Earlier today I was talking with a friend about Wilco and I cannot think of a better band to listen to while tying up such tiny flies. I haven't listened to their album Yankee Hotel Foxtrot in a while. This album was my first introduction to Wilco and I have not looked back since. This is a very interesting album to say the least. I love how they intermixed the "radio" and "air wave" sounds throughout the album. You would have to listen to the album to understand what I am talking about, but it adds a very interesting element to each song.


#28 Brassie Close Up


One Dozen Brassies

Brassies

Hook: Mustad 3906 12-28
Thread: Uni 8/0 Black
Thorax: Peacock Herl

Monday, April 9, 2012

New Wall Decoration


My birthday is not for another month, but my wife loves me enough to make a nice decoration for my tying room. She made this cool looking sign with my screen name, a fly rod and this really neat looking fish that is turning to take a fly. This sign is really nice and looks great on the wall. The details on the fish are incredible and I love the look of the letters she made. It never ceases to amaze me the things she can do. I have to admit that I did help a little. OK very little, she needed a fly to put on the sign so I tied one up for her. I guess I am lucky that she doesn't always like to do girly crafts and would prefer to do something like this. Check this thing out!


You can see more information about it on her blog Minced Paper. If you are interested I’m sure she would be happy to make up something similar for your tying room. Well, for the right price at least!

Saturday, April 7, 2012

Time Well Spent

Tonight has got to be one of the best nights I have had in a very long time. Being a divorced father, I don't feel like I ever get to spend enough time with my two daughters. While they are here, I try to spend as much quality time with them as I possibly can. Tonight, while my youngest daughter was up in her room playing on her computer, my oldest and I got to talking about the future, where she is going to go to college and what she plans on studying. Our conversation eventually came around to how much college is going to cost and while I will not be able to cover the costs completely, I will help as much as I can. Part of this plan is to try to leverage this blog and my fly tying, if at all possible. While I do not want to get into production fly tying, I figure I can tie up an extra dozen flies each night and try to sell them on eBay or Craigslist. While I cannot promise anything, every extra dollar will help. This brought a big smile to her face. We headed to the closet to spend a few more hours talking and to tie up a few flies.

While working on some more Bully's Bluegill Spiders, I happened to notice all the scraps of chenille I had accumulated during our work. My first thought was "Man, that is a lot of waste." Then it dawned on me, I can use all that chenille to tie up some Green Rock Worms! Why let all that go to a landfill?

There are several pattern imitating the green rock worm, but I like how this particular one moves in the water. Besides, this is a very simple pattern, using just a few readily available materials. It doesn't get any better than that!


Green Rock Worm

Green Rock Worm

Hook: Tiemco TMC2457 #18
Thread: Uni 8/0 Black
Thorax: Peacock Herl

Step One


Start Thread

Step Two


Tie in Chenille

Step Three


Tie In Peacock Herl

Step Four


Wrap Peacock Herl Forward

Step Five


Whip Finish, Trim Body to Length and Singe End of Chenille With a Lighter to Create Tapered Body


Monday, April 2, 2012

Bully's Bluegill Spider

As usual when I was out and about taking my daily stroll, I was listening to a little Pandora Radio.On my Black Crowes "channel" this cool little drum line started, followed by an even better bass line. I was already hooked when the sweet blues guitar started in... I was convinced it was a Stevie Ray Vaughn tune that I possibly had not heard before – that is, until the vocals kicked in. Was I really listening to John Mayer? For those of you that don’t know it, John Mayer is actually a very accomplished blues guitar player. While I knew this, I didn't expect one of his live songs to get me going like this. I couldn't wait to get home to check out the rest of the album on Spotify. The album is Try! John Mayer Trio Live in Concert. While the entire album is fantastic, I will the admit the song that got me, "I've Got A Woman", is by far the best track on the album. The funny part is that my least favorite song on this album is one of his songs that gets a lot of radio play.

While I was jamming to the album, I figured I better work on a few more bluegill flies! Tonight I figured I would work on Bully's Bluegill Spiders. This pattern is a killer with big gills. When fishing this fly, work it in slowly and let it drop on each pull. More than 90% of your takes will happen while the fly is falling. This fly can be tied in any number of colors to suit your tastes. I tied this one in Olive and Yellow.


Bully's Bluegill Spider

Bully's Bluegill Spider

Hook: Mustad 3906B #8-12
Weight: Medium Lead Wire In a "ball" at hook bend
Thread: Uni 8/0 Bright Color Depending on Color Pattern
Body: Ultra Chenille Color of Choice

Step One


Attach Lead Wire in a Double Layer To Form a Ball at Hook Bend

Step Two


Tie in Ultra Chenille Towards Front of Hook

Step Three


Wrap Chenille Back and Over the Lead Then Forward Again Forming a Reverse Tear Drop Body

Step Four


Tie In Top Rubber Leg Material. Legs 

Step Five


Turn Vise Over and Tie in Bottom Rubber Leg Material

Step Six


Form a Large Head, Whip Finish and Trim Legs to Length

Step Seven

Go Fishing

Sunday, April 1, 2012

Bluegill Spiders

My wife is having a hard time understanding the concept of catch and release fishing. In her mind, fishing is a way to put food on the table. She wants fish to eat and cannot understand throwing back perfectly tasty fish. I tried to explain how you throw back certain fish for different reasons and keep others to eat. These reasons may include, fish management, growth rates, and spawning behaviors to name a few. To which she always responds, "then why waste time fishing  for trout if you are not going to eat them?" "Why not just fish for bluegill, perch and walleye." "That way we have fish to eat." Well to make her happy I better do a little bluegill fishing. It's not the perch and walleye that she loves, but it will do. So I guess I better get busy tying up a few flies for bluegill fishing.

While not the sexiest of fish to catch, bluegill are a lot of fun and very tasty. For those that have fished for bluegills before, you know how much fun they are to catch. For their size these little buggers put up one heck of  a fight. When the gills are on their beds in the spring they are very territorial and very aggressive. This is the best time to catch big bluegills and sunfish. They will take just about any fly to defend their nest. Especially big foam spiders. Hopefully I will catch a bucket load so we can have a nice little fish fry.

Here is one foam spider that I have had some good luck with.


Tan Bluegill Spider

Foam Spider

Hook: Mustad 3906B #8-14 (While not a dry fly hook with the foam it doesn't matter)
Thread: Uni 8/0 Black
Under Body: Peacock Herl
Over Body: Craft Foam Strip (Width and Length depending on hook size)

Step One


Tie in Foam Strip

Step 2


Tie in Peacock Herl and Wrap Forwards Approximately 2/3 Hook Length

Step 3


Bring Foam Forward and Tie in at 2/3 Length

Step 4


Bring Thread Forward and Tie In Foam at Hook Eye

Step 5


Fold Foam Back and Tie In at 2/3 Length

Step 6


Trim Access Foam to Desired Length

Step 7


Tie In Rubber Leg Material Then Whip Finish.